With BPM Tutorial: The leave application process, you will initially approach how to model a paper workflow into a simple software process. Based on Process Desiger – Workflow Center from IBM.
PART I: MODEL THE PROCESS
Lesson purpose:
- Create Process Application
- Add Teams by adding Lane and assigning team to Process
- Add Activities, events, and gateways to Process
- Add the itermediate event timer to Process
- Create variables for Process
- Create your first Snapshot
Application requirements: You must have Process Designer (ver 8.6.0) installed on an available server and log in with a web browser (Optimal for Firefox)
1. Create Process Application
First you have to create Process application before you can do anything, Process Application is stored on Process Center repository.
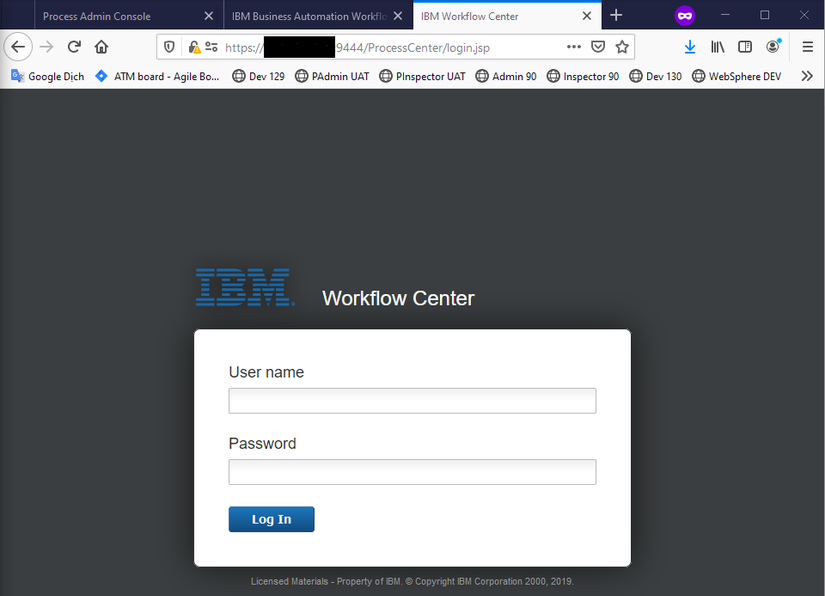
- Log in to Process Center

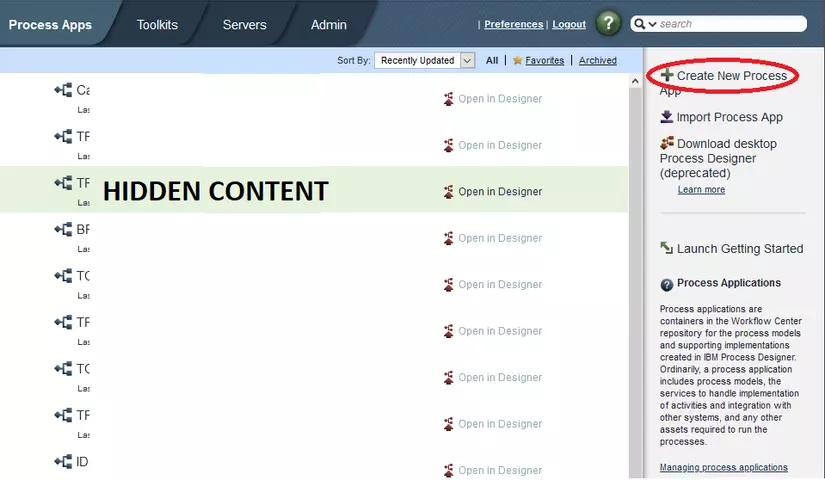
- Click Create New Process App
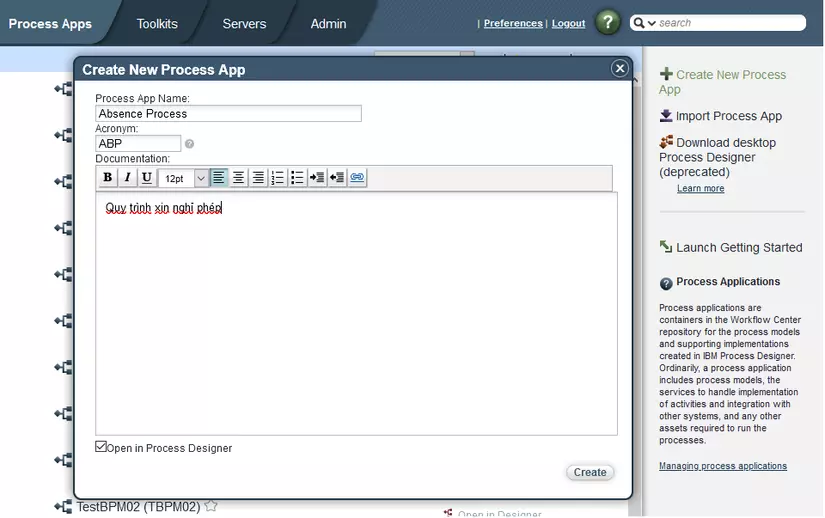
- Fill in the following information:
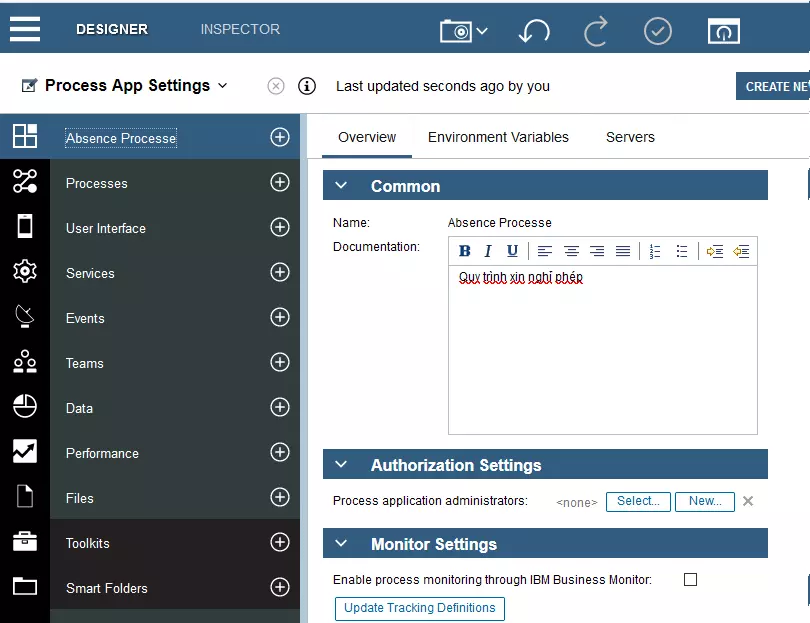
- Click Create , to open the process, Click Open in Designer . It will bring up Process App Settings
2. Create Process
In the Library (tab select 3 dashes), click Processes and choose Process and type “Absence Management”. The process diagram screen is generated as follows: 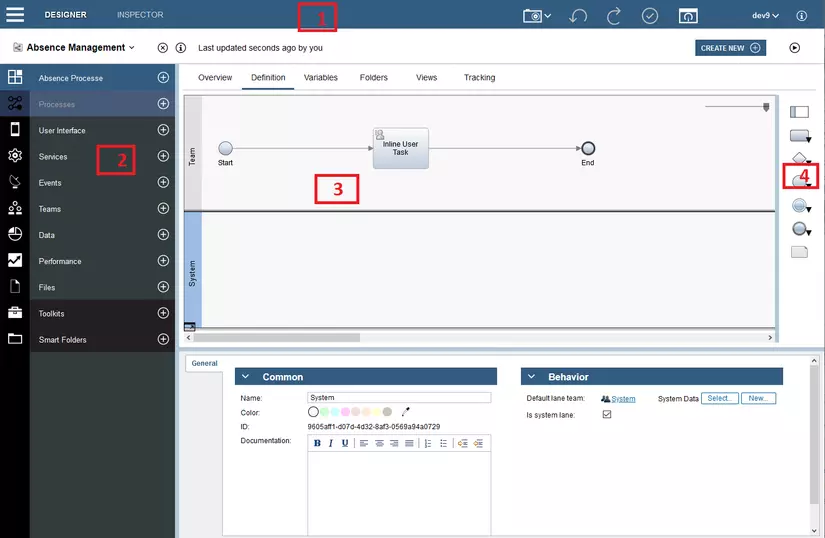
| No | Area | Detail |
|---|---|---|
| first | Main toolbar | Access Designer, Inspector, Optimizer and Process Center. Button to save all edits, create snapshots, help … |
| 2 | Thư viện | Access to the library items for the current process |
| 3 | Main canvas | The area where you can illustrate the process. Each process is automatically initialized with a start event and an end event. The two default lanes include one for the user and one for the system |
| 4 | Palette | Includes components for process modeling |
3. Create Team
Based on the requirements of the process, you must create a team for each of the user roles: Employee, Manager. To model a team, you add a lane and assign team to that lane. Each lane contains activities representing a team or system operation / implementation. When you create a Process, Process Designer creates two default lanes: Team and System. With Absence Process, you have to create lanes and teams like this: (This is only a demo process so we will use the user who is implementing develop to assign it to the team)
| Lane | Team title | Team properties |
|---|---|---|
| Employee | Employee | Members (select the user you are using) Manager is left blank |
| Manager | Manager | Members (select the user you are using) Manager is left blank |
| System | System |
We have the following definitions:
| Concept | Description 2 |
|---|---|
| Lanes | Provide the context for a process model |
| Teams | Include members that perform modeled tasks |
| Members | User groups or individual users of the team |
| Managers | Manager can access Team Performance dashboard in Process Portal to manage |
Procedure:
- Click on team lane, in the General section rename it to Employee
- Create a team for the lane Employee:
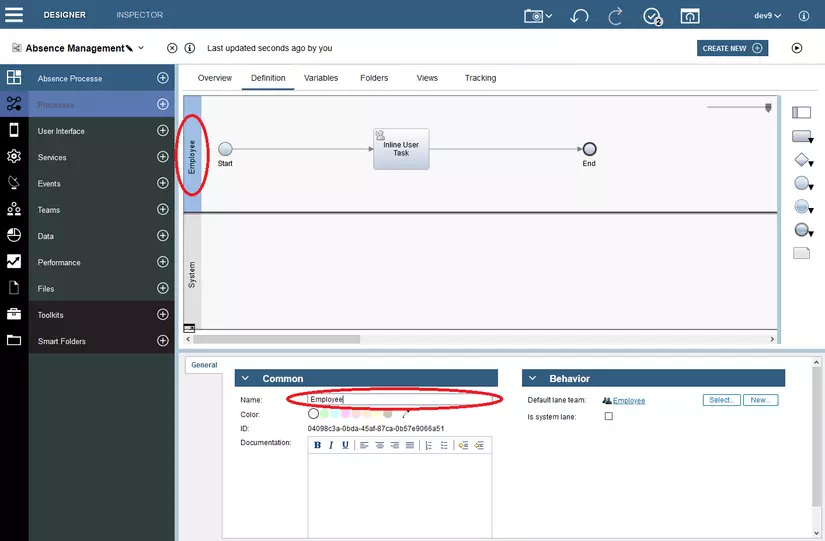
- Under General / Behavior , Default Lane Team click New .
- Enter Employee and click Finish .
- In the screen displaying the properties of Team Employee, section Members , User select the user you are logged in
- Under Managers, select Manager of All Users
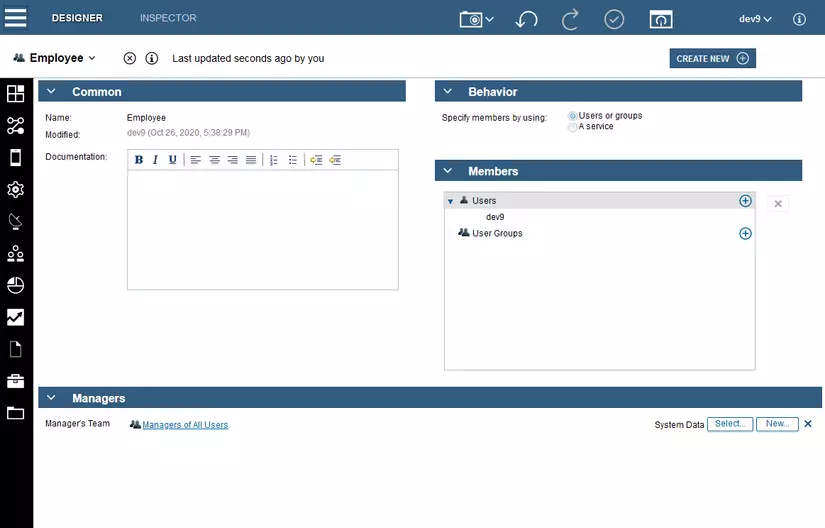
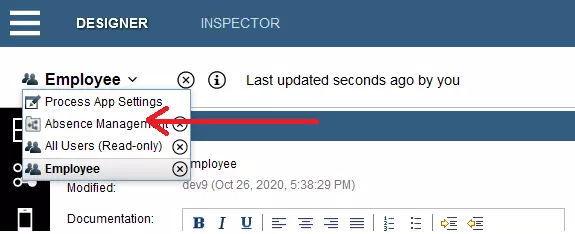
- Press the arrow to return to the process
- Create lane Manager:
- Drag and drop a lane from the palette onto the diagram
- Name the lane Manager, change the color in the Color section to blue
- Create team for lane Manager: (similar to step 2)
- Click the Finish editting button

4. Create activities and events
We have several definitions:
| Concept | Describe |
|---|---|
| Event | Control flow (flow) and objects in the process |
| Start event | Get triggers at the time of process initialization. |
| End event | Occurs when the process finishes and all of the components in the process finish |
| Activity | A single work task that a human or a system must perform in the process going from start to end. There are many types of Activity |
| User task | An Activity type User Task, by human implementation and complete |
| System task | Is an Activity type System task, by the system automatically or the service automatically completes |
| Script task | An Activity that uses JavaScript for processing |
| Decision task | An Activity that handles conditions or decisions |
Procedure:
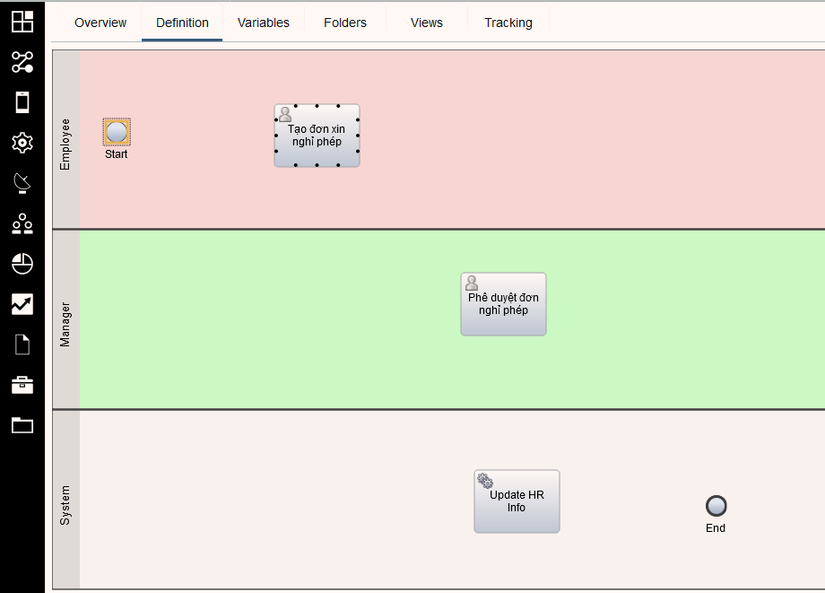
- Determine which team will perform the following tasks: Create leave application, Approve leave application, Update HR Info. See the following table:
| Lane | Activities, color, and description | Events |
|---|---|---|
| Employee | Create an application for leave. Red. The user will fill out the form and create a leave application | Start |
| Manager | Approval of leave. Green. User will approve or deny the application for leave | |
| System | Update HR Info. Default color. From the manager’s decision, the system will update the user’s remaining date of leave | End |
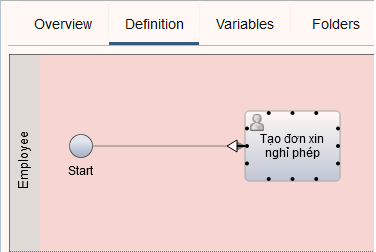
- Open Process Absence Management , tab Definition
- Delete the default Inline User Task from the desktop, and drag Activity from the Palette column to the Employee Lane
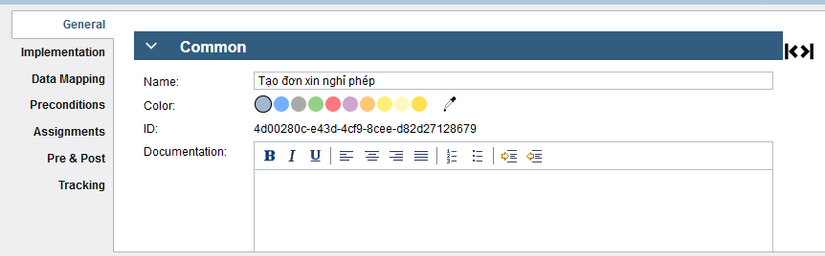
- In the Properties section,
- General changed name to Create leave application
- Implement Section Activity Type , choose User Task (note that in addition to this method, you can click the arrow next to Activity Palette, select User Task then drag and drop)
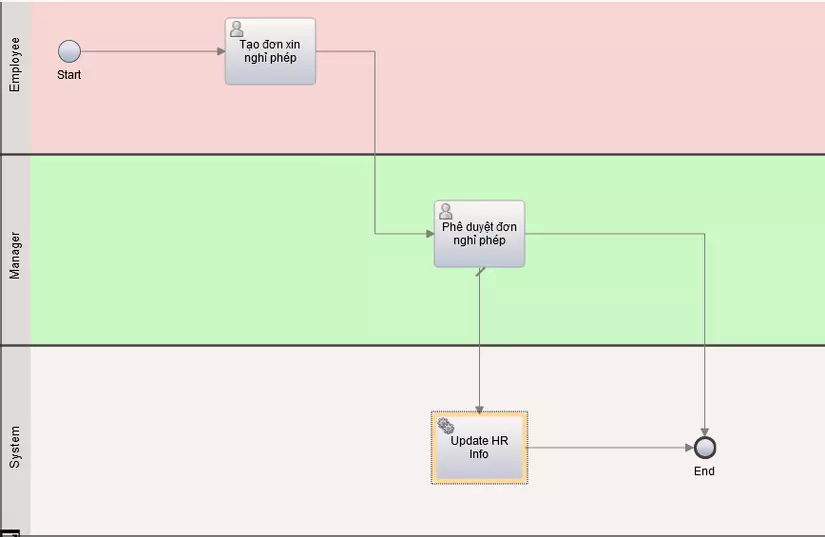
- Add User Task and System Task to the diagram, and move Event Start and End as shown below:
- Save
5. Create flow
Now that the process has activities and events, you have to add basic threads to control those things. This flow of control will link activities together and see who completes those activities.
Note: If there is more than one line connecting from an object, the first line added will be the default flow, the next line will follow a certain condition.
Usually, you will have to add objects to control the flow, the gateway is an example when there is more than one exit for a particular activity. We go through the following concepts:
| Concept | Describe |
|---|---|
| Conventional flow |  An arrow indicates the next step in the process when the previous step ended An arrow indicates the next step in the process when the previous step ended |
| Flow is conditional |  An arrow that computes a conditional expression and the calculation result determines the next path when the condition is met. An arrow that computes a conditional expression and the calculation result determines the next path when the condition is met. |
| Default Flow |  An arrow with a dash at the top, depicting a default path when no conditions are satisfied An arrow with a dash at the top, depicting a default path when no conditions are satisfied |
Procedure:
- Open Process Absence Management , tab Definition
- In Process Diagram, move your mouse to Start and click on the drag and drop point to create the arrowhead.
- Drag the mouse pointer to the select point of Create leave application and click again.
- Likewise, we connect Create Leave Application with Approval of Leave Application and Link Leave Approval with Update HR Info , concurrently Link Leave Approval and Update HR Info with End .
- Save.
6. Create an event gateway
The event gateway represents a branch point in the process where only one or several flows can be followed, depending on the event (condition) in progress. To simplify diagrams, gateways are often named on a question and the outputs can be the corresponding answer. In Absence Management, you need to create the following two gateways:
- Transfer approval? : If the request for leave is filled out and ready, then send it to the Manager, if you want to cancel the intent to take leave, your leave application will be canceled.
- Approved? : There are three scenarios: If the Manager agrees to approve, the thread will go to notify the HR, and subtract the leave. If not, the stream will email to staff. If an edit is requested then the stream will return Create a leave of absence .
We have the concept:
| Concept | Describe |
|---|---|
| Gateway | Process flow control, e.g. thread retrieval / divergence, definition, branching, threading. There are two main types of gateways: division and aggregation. That is, the gateway can divide the flow into many different branch threads or can merge many different threads into one thread. Hence there are two types of gateway: exclusive and parallel (unique and parallel). |
| Exclusive gateway | Leads the process through a single thread. After the condition is satisfied, only one conditional flow is followed, if none of the conditions are satisfied then the process passes the default flow. |
| Parallel gateway | Parallel gateway leads the process through all parallel threads without any conditions. |
Procedure:
- Open Process Absence Management , tab Definition
- Drag and drop Gateway from the Palette bar to the area to the right of Create leave application . Fill Transfer approval? on the name.
- Connect the gateway:
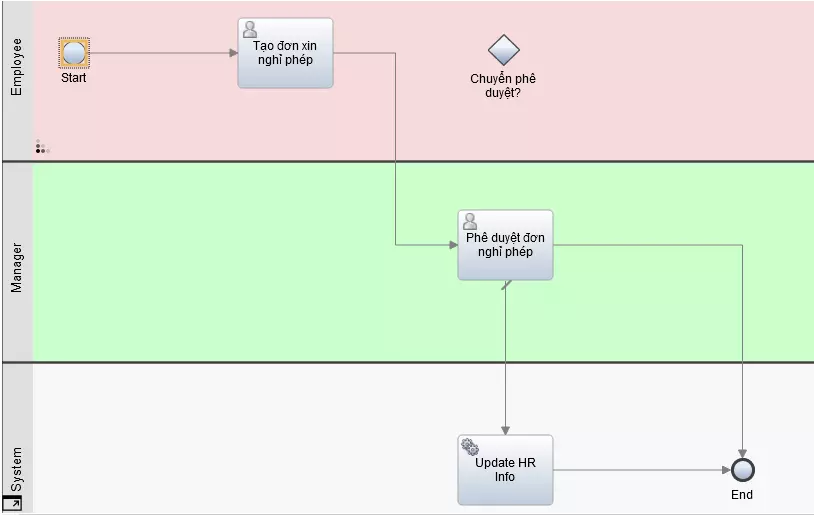
- Click on the link from Create leave application and Approve leave , click Delete
- Connect Create leave application with Gateway Transfer approval?
- Drag and drop from the Palette bar an End Event , connect the Gateway Transfer approval? With End Event , continue connecting this gateway with Approval of Leave Application .
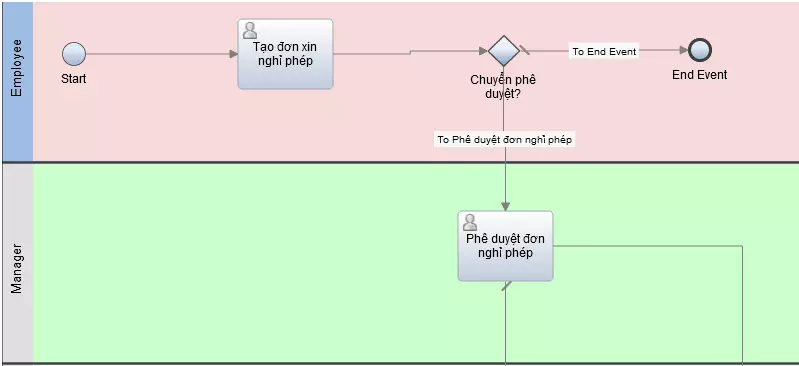
- Name the stream
- Click the flow link between Approved Transfer? and End Event
- In the Properties / General section change the name to Cancel application , make sure that you tick the Name visible box to show the name of the thread on the diagram.
- Likewise click on the link between Transfer approval? and Approval of leave of absence , renamed Approval required

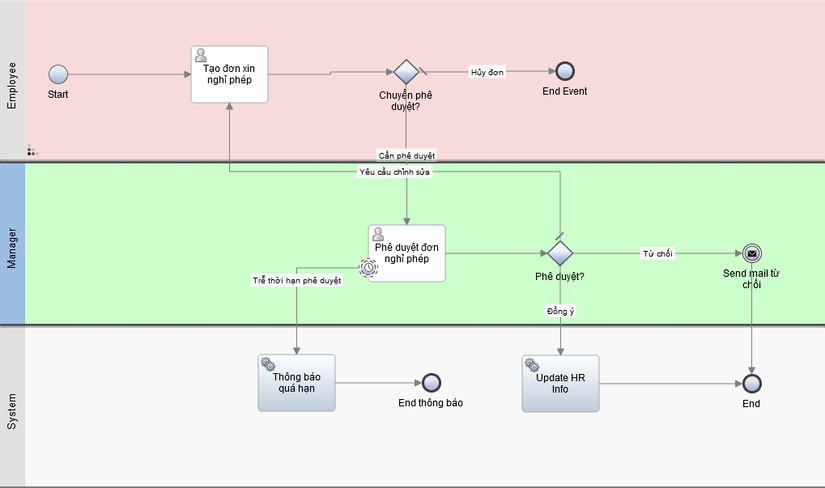
- Repeat steps 2 and 3 to create gateway Approve? is linked after Approval of Leave
- There are three possibilities at this gateway
- Regulatory Requirements: Approved Connector ? Back Create application for leave
- Reject: Pull out an Intermediate Event / Message (sending) from the Palette and connect Approve? with this event, then append from this event to End
- Agree: match from Approve? to Update HR Info then to End

- Save.
7. Create a timer intermediate event
In this section, we will put a Timer intermediate event, which will be launched when the Manager keeps a resignation form for too long without an approval / rejection …
| Concept | Describe |
|---|---|
| Intermediate event | Occurs between the Start event and the End event of the Process. There are 3 types: timer, message and error. We use the intermediate event to execute services at a specified time when the condition is met. The Intermediate event can either be in stream or attached to the Activity |
| Timer intermediate event | Used to determine the exact time before an action occurs |
| ECM Content intermediate event | When an ECM Content message is received, the next action will be executed |
| Message intermediate event | Send or receive messages |
| Error intermediate event | Used to identify possible exceptions while a process is running and handle them with error handler activity, sub process or flow. |
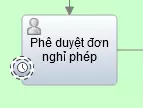
- Drag from the Palette to an Intermediate Event / Timer , attach it to the Leave Application Approval Activity. Note that must attach to the new Activity border.
- In the Properties / General section, name the event ** Outdated approval **.
- In the Properties / Implementation section, uncheck the Interrupt Activity box, keep ticking the Repeatable box.
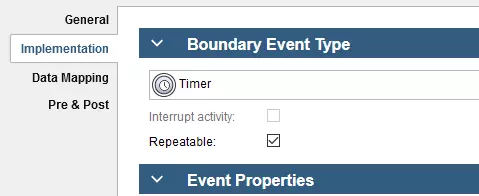
Note:
- If we choose the Interrupt activity , then this Timer trigger is the Activity. Approve the leave is also closed, we have to uncheck this button because we want the Manager to enter the task when receiving the notification.
- If we uncheck the Repeatable button, the message will be sent only once. If we select this button, the notification will be sent at a specified interval until the Activity is completed.
- Add Notification overdue activity
- Drag a System Task activity from the palette to the System lane , to the left of Update HR Info
- Name the activity as Notice Outdated
- Connect the Timer with Outdated Notice
- Name the stream between Approval Overdue and Outdated Notice as “Delay in Approval” and tick Name visible. Under Type, choose Exception Path
- Add an End event in the stream, drag and drop from the palette to the right of the Overdue Notifications and append from there to End event too, name this End event as End, the Diagram will look like this:
- Save.

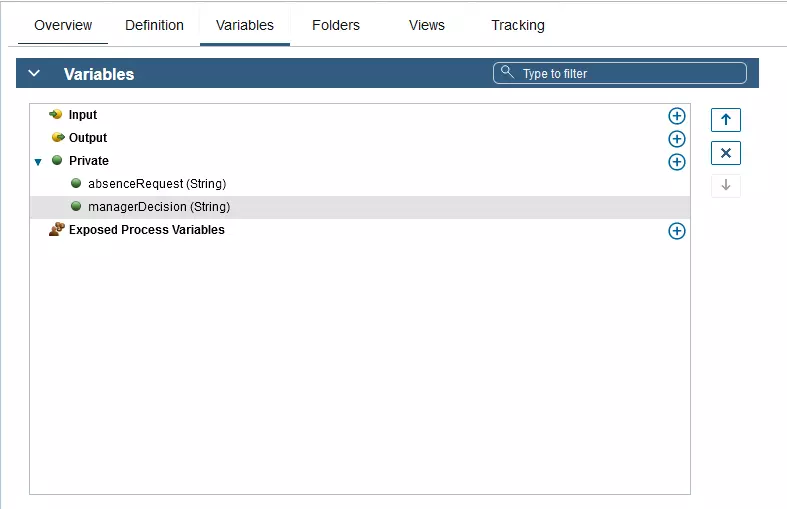
8. Create process variables
We need some Private variables to describe and represent the resignation as well as the gateway decisions.
- absenceRequest
- managerDecision (note the rule of naming variables according to camel case) We come to the concepts:
| Concept | Describe |
|---|---|
| Variables | Theoretically speaking, a variable is to provide data about the current context of the running process. Using a variable, the process transfers data from one step to another. There are 3 types of variables below: |
| Private variables | The current process variable needs or the service needs |
| Input variables | The variable is passed into the process or service |
| Output variables | The variable is passed to the process or service |
How to proceed to Create variables:
- Open Process Absence Management , tab Variables
- Click the plus sign in the Private section to add a private variable, enter absenceRequest , create another variable managerDecision
- Note that we still leave the data type of the variable String (the default) because we will change it in the next section when creating the Business object.
- Save.
9. Create the first process snapshot
A snapshot is a state of the library item in the process for a certain time. You can create snapshots in Process Center or in the Designer screen. Management of each snapshot such as install, export, archive, etc. is performed in Process Center. How to create a snapshot
- Check the process again
- In Process Designer, click on the icon above main Toolbar / Create a new Snapshot
- Enter 0.1 in the name field and click Finish
 main Toolbar / Create a new Snapshot