1. Connect to the device
Typically, for the sake of convenience, we will use a shell to access the device.
a. Remote shell
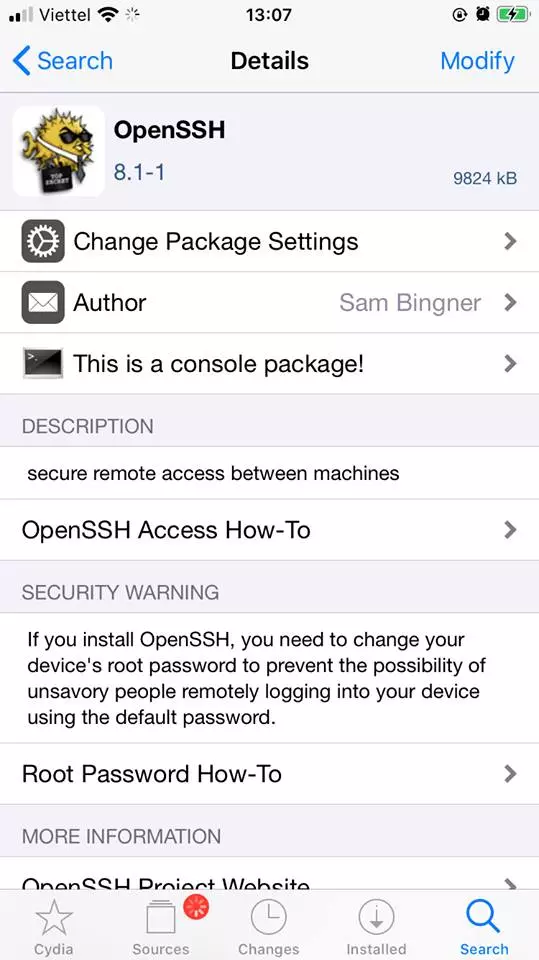
To get a remote shell to an iOS device, we will use it via ssh. First, go to Cydia, search for the keyword OpenSSH . After installation you will see something like this:
Next, connect the computer and the test device to the same local area network. Then use ssh to the device with the command:
1 2 | ssh -p 22 <a class="__cf_email__" href="/cdn-cgi/l/email-protection">[email protected]</a> <ip của iOS> |
In which <ip of iOS> is the address of the test device in the intranet. This information can be viewed at Setting> Wifi> <tên mạng wifi> . The default password for the root account after jailbreak will be alpine . I encourage you to change this password if working in a not very private environment because other people can also access your iOS device with this default account. Refer to changing the password below.
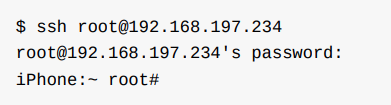
So we have access to iOS devices already.
Change the password of the iOS device
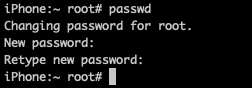
After accessing the device, to change the password similar to with linux, type
1 2 | passwd |
Then enter a new password and confirm this new password.
b. On-device shell app.
c. Via Usb
In fact, using the same wifi network is often not feasible or effective due to the flickering signal. The way I encourage using a connection via usb.
On an iOS device, there is a daemon process, Usbmuxd that allows to map the port on the device to the TCP port on the host computer. This makes it possible to set up an ssh connection without really needing a network connection. Once usbmuxd sees the iOS device running in normal mode, it will connect to the device and begin forwarding the requests it receives via /var/run/usbmuxd .
Connect macOS and iPhone with iproxy:
- First install
libimobiledevice
1 2 | brew install libimobiledevice |
- Next map port 22 of the iOS device with 1 port of the host TCP with
iproxy:
1 2 | iproxy 2222 22 |
Where 2222 is the tcp port of the host machine. Finally, make the connection to the iOS device only:
1 2 | ssh -p 2222 <a class="__cf_email__" href="/cdn-cgi/l/email-protection">[email protected]</a> |
Since port 2222 is always on the host machine, the address used will be localhost .
2. Host-Device Data Transfer
a. Copying App Data Files via SSH and SCP
The app’s data will usually be located at (/private)/var/mobile/Containers/Data/Application/<app id data> . To get this data, you can use scp to download it via ssh connection. Since scp only transfers one file at a time, it’s easiest to compress it and then transfer it.
Data compression:
1 2 | tar czvf /var/mobile/Containers/Data/Application/<app id data> (<nơi lưu>) |
To find <app id data> you can use the find command to search:
1 2 | find /var/mobile/Containers/Data/Application/ -name <key word> |
with keyword usually app name.
Once you have the compressed file, go to the host machine’s shell and run scp to download it:
1 2 | scp <a class="__cf_email__" href="/cdn-cgi/l/email-protection">[email protected]</a> :<nơi lưu> <nơi lưu trên máy host> |
If connecting via usb as above, add the option -P <tcp port> .
1 2 | scp -P 2222 <a class="__cf_email__" href="/cdn-cgi/l/email-protection">[email protected]</a> :/var/root/dvia.tar ./ |
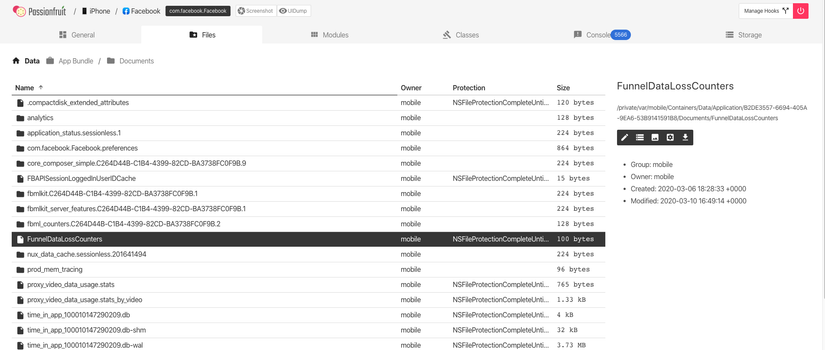
b. Passionfruit
On passionfruit’s interface, switch to the File tab, find the file you want to download and click, will see on the right there will be many options to view or download the file.
c. Objection
Because I haven’t used Objection yet, I’ll add it later
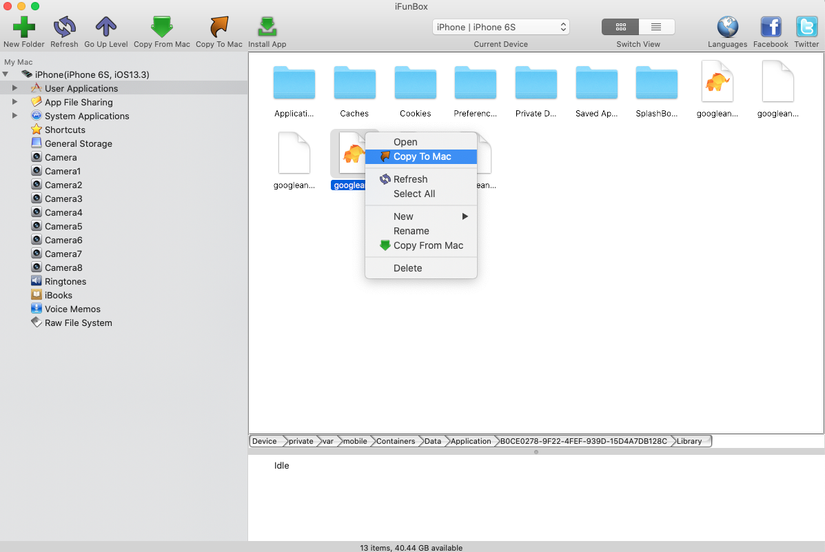
d. iFunbox
At iFunbox interface, right click on the file you want to download and click copy to mac ==> so easy.
3. Obtaining and Extracting Apps
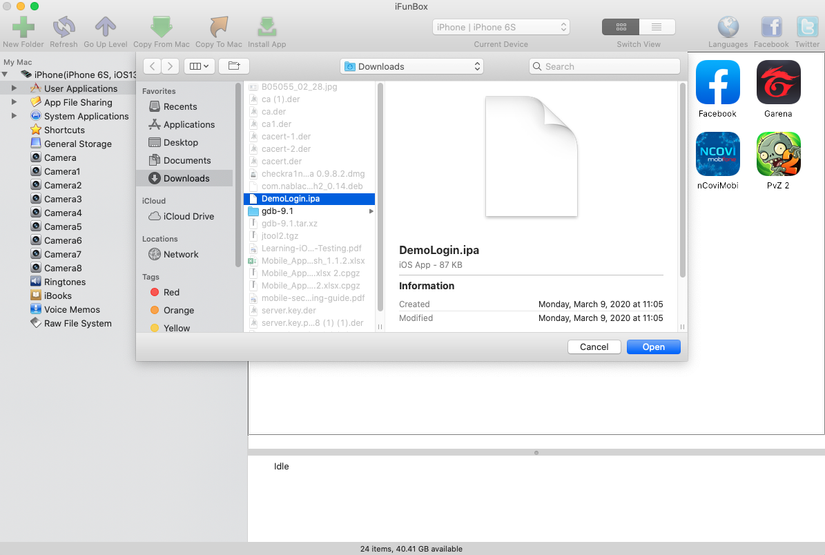
Getting the IPA File from an OTA Distribution Link
This part is only a translation of OWASP because it has never been in contact with OTA before, maybe when doing reality, there will be
During the development process, sometimes the tester will be provided the app through an over-the-air (OTA) distribution. In this case, we will get an itms-services link, like this:
1 2 | itms-services://?action=download-manifest&url=https://s3-ap-southeast-1.amazonaws.com/test-uat/manifest.plist |
We can use itms service assets downloader to download IPS from OTA distribution URL. To install, run the command:
1 2 | npm install -g itms-services |
Save api:
1 2 | itms-services -u "itms-services://?action=download-manifest&url=https://s3-ap-southeast-1.amazonaws.com/testuat/manifest.plist" -o - > out.ipa |
Acquiring the Binary App
a. From the API file:
If you already have an api file (maybe already a binary already decoded), simply extract and read it. Usually the binary will be in the main bundle (.app) directory. On macOS, .app is opened simply by showing package content. (In Finder, right-click and select Show Package Content).
b. From jailbroken devices
Without api file, we need a jailbroken device to install the app on it. However, because of the DRM, the binary app will be encrypted so pulling it back for use is almost pointless. To get the decoded binary, we will use tools like frida-ios-dump or Clutch.
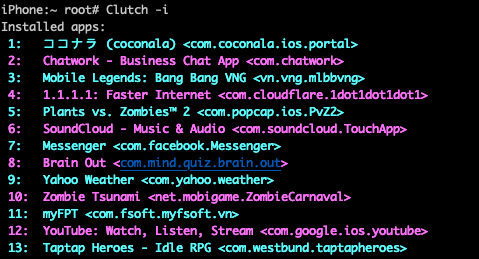
Use Clutch
First, use Clutch to view the applications installed on your device. ( Note Clutch will not recognize apps installed via sideloading, in other words only recognize apps installed from the App Store):
Then dump the app with the command:
1 2 | Clutch -d <id> |
Use frida-ios-dump
I haven’t used this yet so I’ll add it later.
4. Installing app
a. Cydia Impactor
This tool was originally designed to jailbreak iOS. But it has been rewritten to sign and install apps on iOS via sideloading. To install the ipa file, simply drag and drop the file into the app and the installation process will be automatically performed.
b. libimobiledevice
This is a multi-platform library and set of tools to communicate with iOS devices. To install, run the command:
1 2 | brew install libimobiledevice |
After installation, you will be able to perform other commands like ideviceinfo , ideviceinstaller or idevicedebug .
You can then use ideviceinstaller to install the app.
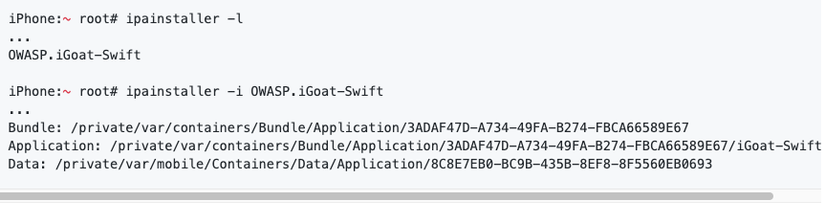
c. ipainstaller
A tool that allows installing apps using ipa file. After uploading the file to the device, use the following command to install the app:
1 2 | ipainstaller App_name.ipa |
d. XCode
- Open XCode
- Select
Window/Devices and Simulators - Select the connected iOS device and click
+to install the app
e. iFunbox
Installing with iFunbox is very simple when you just need to click on the install app and select the ipa file.
5. Information Gathering
This process is a basic process in the pentest app. In this section, we will only talk about: taking out installed apps, viewing packages or data of apps. This will give us some interesting information without knowing anything about reverse engeneering. More advanced techniques will be covered in subsequent articles.
In doing this step, we will focus on answering the questions:
- What files are in the package?
- What framework is used?
- How much capacity does the app require / use?
- What rights does the App claim? What is the purpose?
- Does the App use insecure connections?
- Did the files spawn during installation?
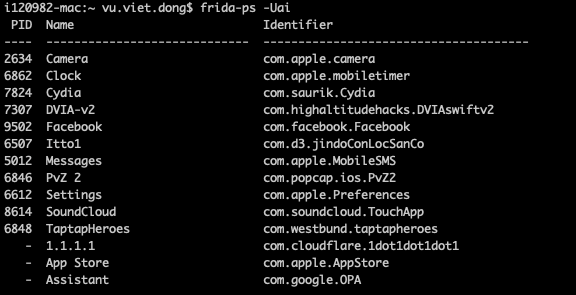
a. List installed apps
We can use frida-ps to retrieve apps (A) installed (i) on devices connected via USB (U) with the command
1 2 | frida-ps -Uai |
You can also use passionfruit to view apps on the interface: 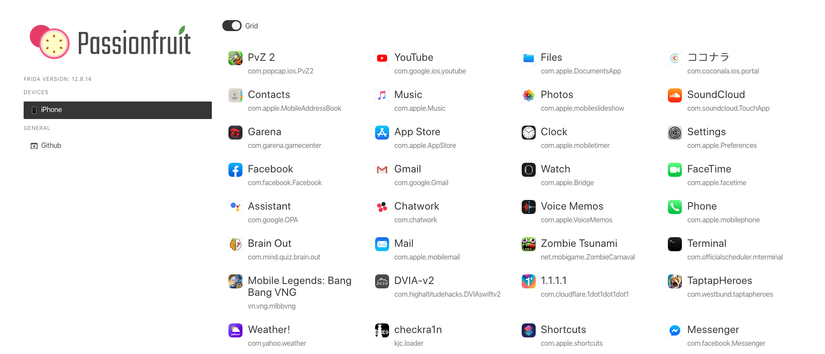
Similar to iFunbox: 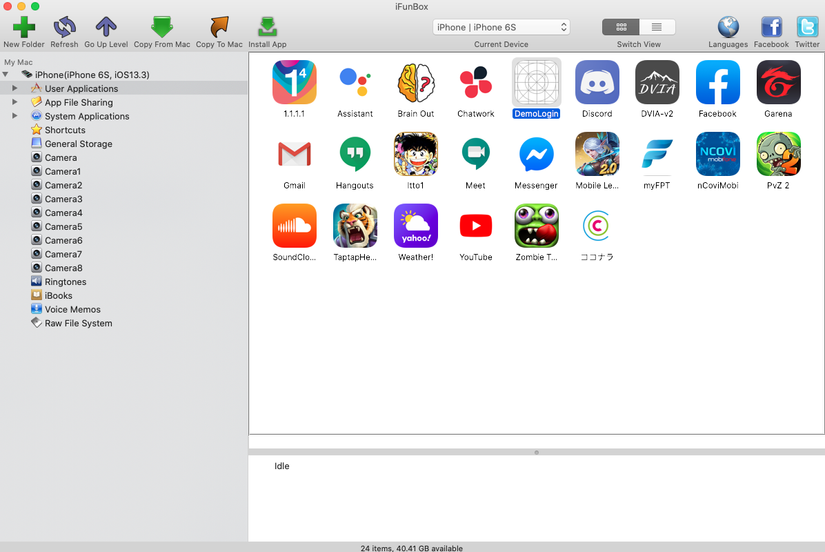
And a few other ways you can find out for yourself.
b. Exploring the App Package
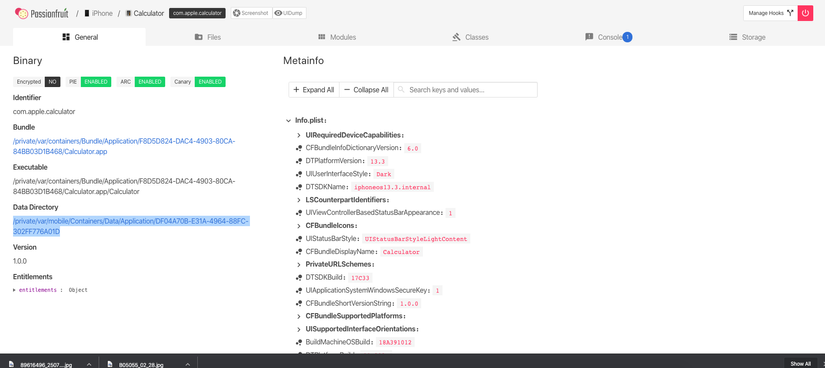
If we have an ipa file, simply extract it with unzip or any other extraction tool. We will see its packages in a payload directory. If not, you can use passionfruit to view this information. Let’s take a look at the key information that can be found here:
Info.plist
The information property list or Info.plist (the conventional name) is the main source of information for iOS applications. It usually has key-value pairs that describe the configuration of the app. In fact, a bundle will usually have an Info.plist file.
You can use plutil to convert to xml1 format:
1 2 | plutil -convert xml1 Info.plist |
In addition passionfruit also supports viewing these files directly.
App binary
The iOS App binary is a fat binary (Can run on both 32-bit and 64-bit). Unlike Android when it is possible to decompile binary into Java / Smali code, iOS’s app binary can only be deassembler.
We will talk more about this in the section on “Reverse Engineering and Tampering on iOS”
Native Libraries
These native libraries are also known as Framwork. You can see these frameworks in the “Modules” section of passionfruit: 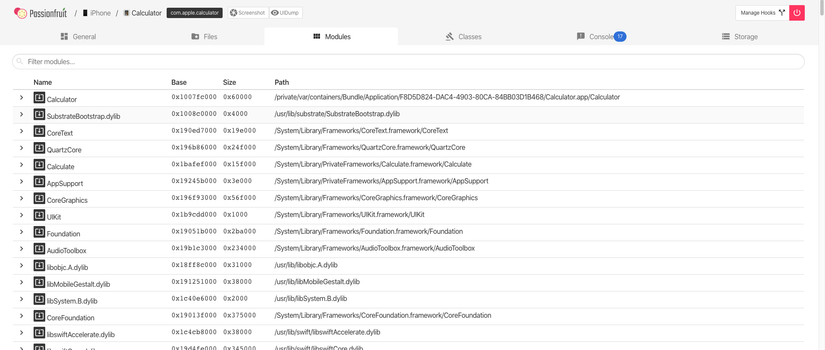
For ipa file, it is located in Frameworks folder.
Note: This may not be a complete list of frameworks, it is possible that there are frameworks in the source code and not displayed in this section. The only way to see these frameworks is to read the section about Tampering and Reverse Engineering on iOS .
Other information
- Keychain
- sqlite3 database
- yap database
- realm database
- couchdatabase
- Log
….
c. Accessing App Data Directories
First, the app data will be stored at (/private)/var/mobile/Containers/Data/Application/<app data id> . However, the <app data id> and <app bundle id> are different ids and the manual search will take a long time, so let’s look at a few ways to find the coordinates of the app we need:
- Use
find:
1 2 | find (/private)/var/mobile/Containers/Data/Application/ -name <pattern> |
- ipainstaller:
- Use passionfruit
And dozens of other ways, find out for yourself.
Usually an app will have directories like
- Documents /
- Contains information generated by the user.
- Users can view and write this information.
- The content is backed up.
- App can turn off the path using NSURLIsExcludedFromBackupKey.
- Thư viện
- Contains non-user files such as caches, preferences, cookies, and property list (plist) configuration files.
- iOS apps often use Application Support and Caches subdirectories, but the app can create custom subdirectories by itself.
- Library / Caches /
- Contains semi-stable semi-stable files.
- The user cannot see and cannot write up here.
- Data in this is not backed up.
- The operating system can automatically delete this folder when the app is not running and there is less memory left.
- Library / Application Support /
- Contains the persistent files needed to run the app.
- Users cannot see and cannot edit these files.
- The content of the file is backed up.
- This link can be disabled with NSURLIsExcludedFromBackupKey.
- Library / Preferences /
- Contains attributes that still exist even if the app is restarted.
- The information is saved, unencrypted, inside the sandbox with a file
[Bundle_id].plist. - All key-values using NSUserDefaults can be found in this file.
- tmp /
- Used to write temporary files without the need for continuity when running the app.
- Contains caches files which do not need to be continuous.
- User can see.
- Data not backed up.
- The operating system can automatically delete this folder when the app is not running and there is less memory left.
d. Setting up an Interception Proxy
I encourage here we will use Burp Suite to make Interception Proxy because it is easy to use, has many documents and has a support system to find a way to fix the error quite well as well as have many built-in or installable features. add.
For how to install Burp and use basic, review the section about Setup test environment offline.
Configure burp to work with iOS devices:
First go to proxy> options> modify the interface that burp captures the packet as shown. Note: If connecting usb, you can leave loopback for safety.
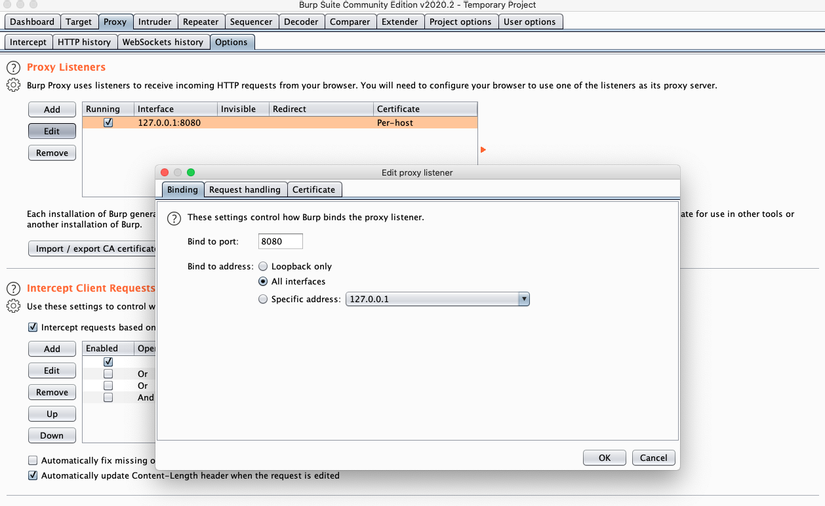
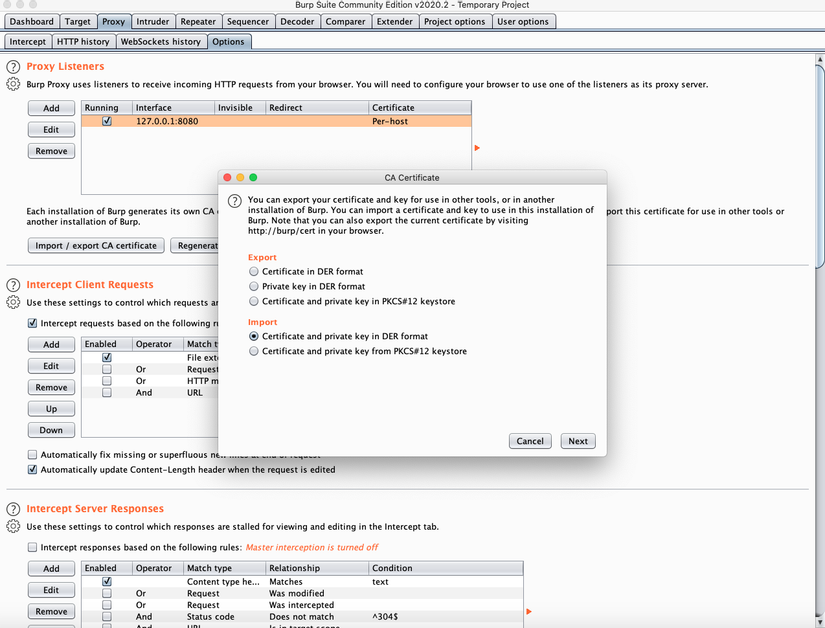
However, there are some apps or websites that will not accept certificates that are too long (if not mistakenly longer than 39 months). So we need to create our own certificate and import it into the burp at proxy> options> import / export CA certificate
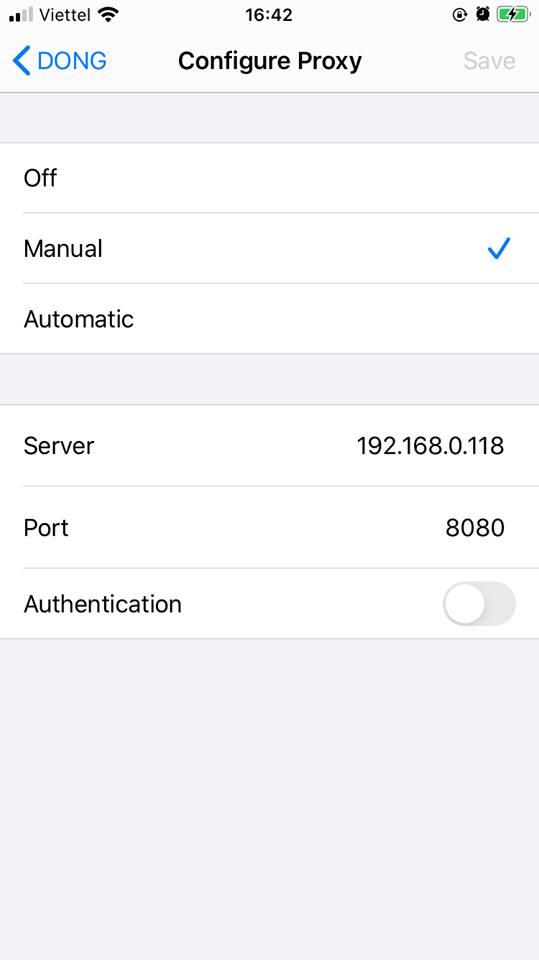
Configure device to connect to burp:
For wifi connection : Connect to wifi network, then look for infomation> configure proxy
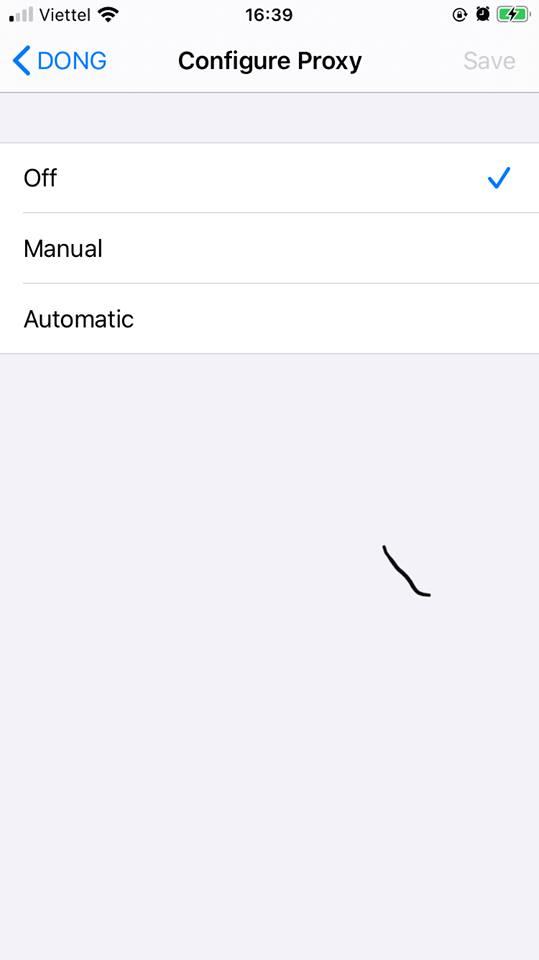
Select manual and configuration:
- Server: <ip of macOS>
- Port: <port on burp> (8080)
For usb connection
- Connect to a wifi network
- Also go to the proxy settings as above, but the server to be
localhost - Perform local port forwarding on macOS with the command:
1 2 | ssh -p 2222 -R 8080:localhost:8080 <a class="__cf_email__" href="/cdn-cgi/l/email-protection">[email protected]</a> |
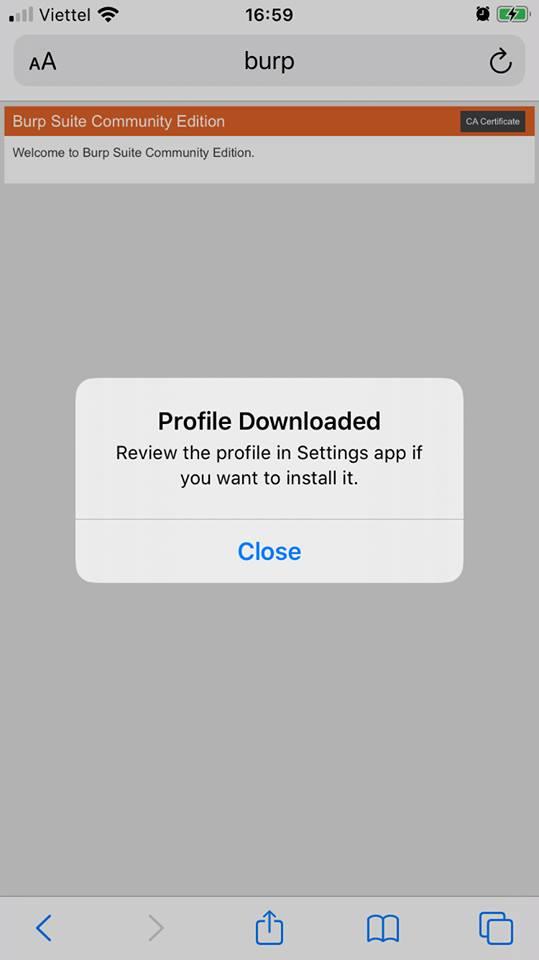
Add a burp certificate to your iOS device:
After configuring the proxy, open sarafy, access to http: // burp

Click on CA Certificate > allow to download the certificate
Go to settings> general> profile
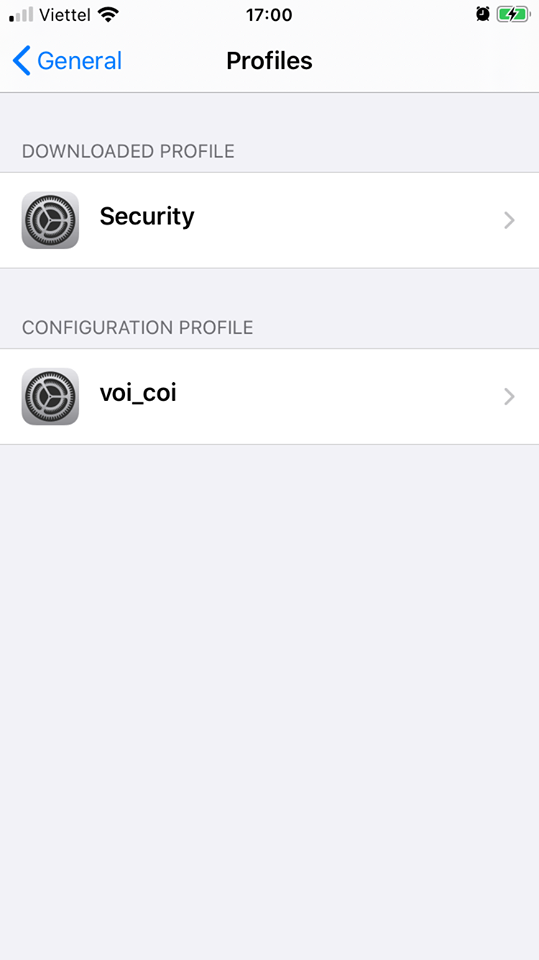
Click on the downloaded profile and install
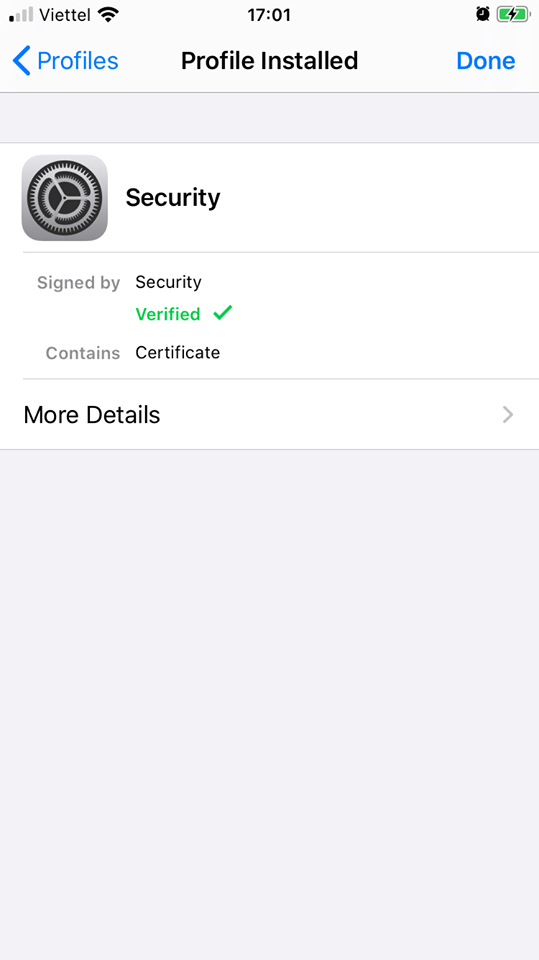
Next go to settings> general> about> certificate trust setting and allow the profile to root the CA

ok that’s it, try to burp to check:
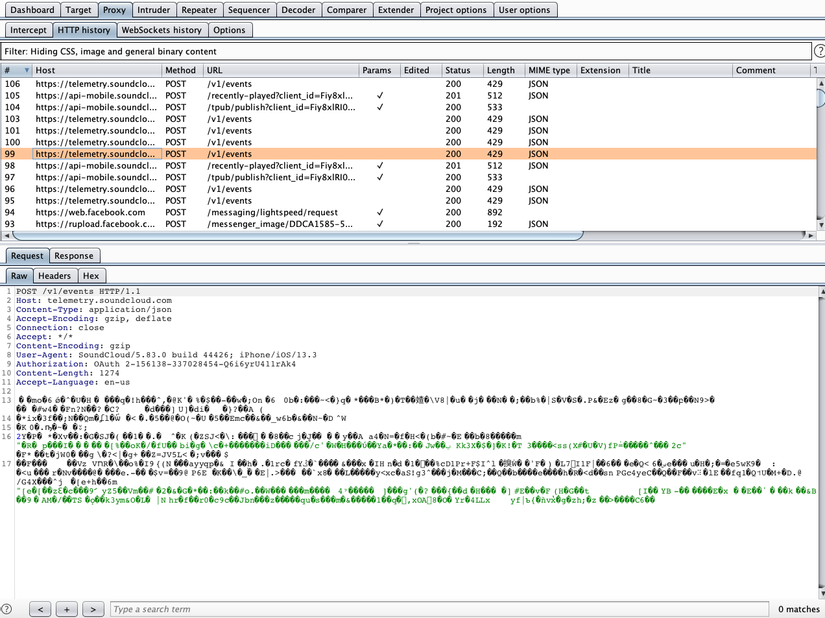
That’s it, the basic setting is to capture the packet.
Nth note: Adding a CA root is one of the ways to bypass SSL Pinning. There are also many other ways, can refer here