In this article we will learn when and how to use FormArray , both in the Component and in the Template, in addition we will see how to customize the validation for it.
Note: To make the article the most effective, please equip yourself with a little more basic knowledge about FormGroup and FormControl .
Why do we need to use FormArray
As you probably already know, when we create an AbstractControl like FormGroup or FormControl , we can use the array as a value. For example
1 2 3 4 5 6 7 8 9 | @Component({ template: '' }) export class SkillsComponent { control = new FormControl(['some', 'value']); group = new FormGroup({ skills: ['some', 'value'] }); } |
However, this declaration will make it difficult to use the Angular API for each element in the array, as well as synchronize values or use API validate. That’s when we need to use FormArray
What is FormArray
FormArray is responsible for managing a set of AbstractControl , be it FormGroup , FormControl or another FormArray .
Like FormGroup , which groups AbstractControl objects in an object, FormArray does the same thing in an array. Angular has specific APIs to help you manage this collection, which we will talk more about later. Now let’s see how to use it.
Works with FormArray
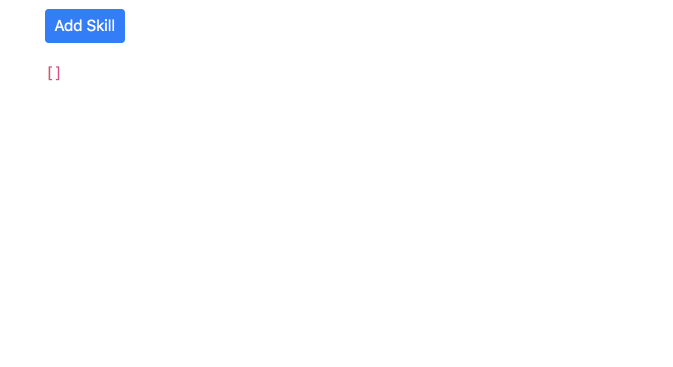
Let’s say we want to display a form that a user can add, edit, or delete from a skill list
1 2 3 4 5 | @Component({ template: '' }) export class SkillsComponent { skills = new FormArray([]); } |
We create a FormArray with the initial value of an empty array. Now see the skills properties:
1 2 3 4 5 6 7 8 9 | { controls: [], valid: true, disabled: false, value: [], invalid: false, ... } |
Like FormControl or FormGroup , FormArray also inherited from the AbstractControl class, so it has many of the same properties, such as valid , dirty , disabled , … In addition, it has an extra controls property to contain an array of elements. by AbstractControl .
Now let’s add a skill:
1 2 3 4 5 6 7 8 9 | @Component({ template: '' }) export class SkillsComponent { skills = new FormArray([]); addSkill() { this.skills.push(new FormControl('')); } } |
Each time we call the addSkill method, we add a new FormControl to the controls array. Now use it in the template. First, we need a loop for the controls property of FormArray :
1 2 3 4 | <div *ngFor="let control of skills.controls; index as i"> ... </div> |
Now, we add each formControl directive control to synchronize each control with its respective element.
1 2 3 4 | <div *ngFor="let control of skills.controls; index as i"> <input [formControl]="skills.controls[i]" /> </div> |
It’s simple right. Now let’s try some other methods we can use too:
removeAt(index): This method accepts theindexand removes the correspondingAbstractControl.
1 2 3 4 5 6 7 8 9 | @Component() export class SkillsComponent { skills = new FormArray([]); removeSkill(index: number) { this.skills.removeAt(index); } } |
1 2 3 4 | <div *ngFor="let control of skills.controls; index as i"> <input [formControl]="skills.controls[i]" /> <button (click)="removeSkill(i)">x</button> |
insert(index, AbstracControl): as opposed toremoveAt(), it adds a newAbstractControlto the index position in the controls array.
1 2 3 4 5 6 7 8 | export class SkillsComponent { skills = new FormArray([]); prepend() { this.skills.insert(0, new FormControl('')); } } |
clear(): removes all elements in the array
1 2 3 4 5 6 7 8 | export class SkillsComponent { skills = new FormArray([]); clear() { this.skills.clear(); } } |
setControl(index, AbstractControl): unlike theinsertmethod, it replaces the existing control with the passedAbstractControl. In the example below, it’s used in thereplace(), to replace the first control with the newly created one.
1 2 3 4 5 6 7 8 | export class SkillsComponent { skills = new FormArray([]); replace() { this.skills.setControl(0, new FormControl('')); } } |
at(index):AbstracControltheAbstracControlin the array’s index position. In the example below the first control will be returned
1 2 3 4 5 6 7 8 | export class SkillsComponent { skills = new FormArray([]); getFirst() { return this.skills.get(0); } } |
Add FormGroup
In the previous section, we learned how to manage a FormControls collection, now let’s see how to manage a FormGroup object in FormArray :
1 2 3 4 5 6 7 8 9 10 11 12 13 | export class SkillsComponent { skills = new FormArray([]); addSkill() { const group = new FormGroup({ level: new FormControl(''), name: new FormControl('') }); this.skills.push(group); } } |
Instead of passing FormControl , we pass FormGroup . Also in the template:
1 2 3 4 5 6 7 | <div *ngFor="let skill of skills.controls;"> <ng-container [formGroup]="skill"> <input formControlName="level" /> <input formControlName="name" /> </ng-container> </div> |
We loop each control, as in the example FormGroup , and pass it to the formGroup directive. Then it’s just syncing the familiar way – pass the name of the control to the formControlName directive.
Use FormArray in FormGroup
Now that you are familiar with the basics, let’s look at some more practical examples where we often use FormGroup inside FormArray
1 2 3 4 5 6 7 | export class UserComponent { user = new FormGroup({ name: new FormControl(''), skills: new FormArray([]) }); } |
Nothing special here, just create an ordinary FormGroup . Take a look at the template
1 2 3 4 | <form [formGroup]="user"> <input formControlName="name" /> </form> |
We add the formGroup directive to the form, and inside, we bind the control name via the formControlName directive. Similarly, to bind to the FormArray ‘s FormArray , we need to do the following 3 steps:
1 2 3 4 5 6 7 8 | <form [formGroup]="user"> <input formControlName="name" /> <ng-container formArrayName="skills"> ... </ng-container> </form> |
First, we need to add formArrayName to the parent element, it’s like running user.get(skills) .
Next, like in the previous example, we need to loop the controls in the FormArray :
1 2 3 4 5 6 7 8 9 10 | <form [formGroup]="user"> <input formControlName="name" /> <ng-container formArrayName="skills"> <div *ngFor="let skill of skills.controls"> ... </div> </ng-container> </form> |
Before getting to the final step, let’s define the skills attribute in the component. The traditional way is to use the getter function to reference the FormArray control from the FormGroup parent.
1 2 3 4 5 6 7 8 9 10 11 | export class UserComponent { user = new FormGroup({ name: new FormControl(''), skills: new FormArray([]) }); get skills() { return this.user.get('skills') as FormArray; } } |
Or we can declare it as a variable
1 2 3 4 5 6 7 8 9 | export class UserComponent { user = new FormGroup({ name: new FormControl(''), skills: new FormArray([]) }); skills = this.user.get('skills') as FormArray; } |
Now the final step:
1 2 3 4 5 6 7 8 9 10 | <form [formGroup]="user"> <input formControlName="name" /> <ng-container formArrayName="skills"> <div *ngFor="let _ of skills.controls; index as i"> <input [formControlName]="i" /> </div> </ng-container> </form> |
Directive formControlName gets the name of the control that we want to match the form element. When working with FormGroup , we pass the key name of the object, for example:
1 2 3 4 | <form [formGroup]="user"> <input formControlName="name" /> </form> |
It will look for type user.get('name') . But in this case it’s FormArray so the name will be index. In JS, arrays are a special object whose key is a number (based on their index), so the code should look like this: user.get('skills')[index] => FormControl .
Now let’s see the same process with FormArray containing a collection of FormGroup :
1 2 3 4 5 6 7 8 9 10 11 12 13 14 | export class UserComponent { user = new FormGroup({ name: new FormControl(''), skills: new FormArray([ new FormGroup({ name: new FormControl(''), level: new FormControl('') }) ]) }); skills = this.user.get('skills') as FormArray; } |
1 2 3 4 5 6 7 8 9 10 11 12 | <form [formGroup]="user"> <input formControlName="name" /> <ng-container formArrayName="skills"> <div *ngFor="let _ of skills.controls; index as i"> <ng-container [formGroupName]="i"> <input formControlName="name" /> </ng-container> </div> </ng-container> </form> |
Since FormArray now contains FormGroup , we need to use the formGroupName : user.get('skills')[index] => FormGroup directive user.get('skills')[index] => FormGroup .
When we use formControlName , it will look for the closest parent ControlContainer , in this case the current parent FormGroup object.
FormArray Validation
As mentioned in the beginning, we can apply validation to each AbstractControl as we usually do:
1 2 3 4 5 6 7 8 9 10 11 12 13 14 | export class UserComponent { user = new FormGroup({ name: new FormControl(''), skills: new FormArray([]) }); skills = this.user.get("skills") as FormArray; addSkill() { cost control = new FormControl('', Validators.required); this.skills.push(control); } } |
In this case, the validity of the FormArray based on the validity of the AbstractControl . So, as long as there is an invalid AbstractControl , the FormArray ‘s FormArray will be set to false.
We can also apply validate in FormArray directly, for example, we need to validate the array size:
1 2 3 4 5 6 7 8 9 10 11 12 13 14 15 16 17 18 19 20 | function validateSize(arr: FormArray) { return arr.length > 3 ? { invalidSize: true } : null; } export class UserComponent { user = new FormGroup({ name: new FormControl(''), skills: new FormArray([], validateSize) }); skills = this.user.get('skills') as FormArray; addSkill() { cost control = new FormControl('', Validators.required); this.skills.push(control); } } |
As with any AbstractControl , we can pass the validate function, in which case it will get FormArray every time it changes, and return null if the array is valid, otherwise it returns an object of the specified specified. error.
FormArray with Server Data
Let’s summarize everything with a fairly common example that we need to create FormArray controls from the server data returns.
In this case we cannot use patchValue() or setValue() , because the methods are used to update the value of the already existing controls, while the controls corresponding to the returned data are not yet available. create. Instead, we need to create FormArray from scratch and set values for each controls
1 2 3 4 5 6 7 8 9 10 11 12 13 14 15 16 17 18 | export class UserComponent { user = new FormGroup({ name: new FormControl('') }); skills = this.user.get('skills') as FormArray; ngOnInit() { store.select('skills').subscribe(skills => { const controls = skills.map(skill => { return new FormControl(skill, Validators.required); }); this.user.registerControl('skills', new FormArray(controls)); }) } } |
In case we already have the controls in FormArray , we simply need to create the controls we need to add, then add it to the array:
1 2 3 4 5 6 7 8 9 10 11 12 13 14 15 16 17 | export class UserComponent { user = new FormGroup({ name: new FormControl(''), skills: new FormArray([]) }); skills = this.user.get('skills') as FormArray; ngOnInit() { store.select('skills').subscribe(skills => { for(const skill of skills) { this.skills.push(new FormControl(skill, Validators.required)); } }) } } |
The article is quite simple with basic knowledge, hope it is useful to you, if there is something difficult to understand, please comment for me to help you answer!
Source: https://netbasal.com/angular-reactive-forms-the-ultimate-guide-to-formarray-3adbe6b0b61a