Simple Ajax App in Rails
- Tram Ho
Let’s try to write a simple Web application using Ajax using Ruby on Rails! ??
In the article, I will not mention the basic operations anymore, but straight into how to build Ajax, so it can be a bit brief ^^. # Introduction —– #### What is Ajax ? Ajax stands for 「Asynchronous Javascript + XML」, vietsub is「Asynchronous communication based on JS and XML」. The advantage of “Asynchronous” is that even when it runs, it will not interfere with other processes of the system.
* ‘Synchronous communication’ will process each statement sequentially, after processing this statement, then the next statement.
* As for Asynchronous communication', it will continue to execute the following statements regardless of whether the current statement has completed or not. This will make the user experience smoother because there is no need to wait for long, time-consuming commands to be processed. **For example, users can operate continuously on the website without having to reload the page.**create
➤ It is because of this non-sequential statement processing that developing applications using Ajax will also be more difficult and laborious ^^.
***Example of Ajax application in practice:** Facebook Like and Comment function, Add to cart function of online shops...etc..*
You can read more about Ajax here https://www.tutorialspoint.com/ajax/what_is_ajax.htm.
To use Ajax, there are many different ways, but the most popular is still using Jquery. In this article, I also use Jquery to write Ajax functions ?. # Let's start ! ----- > Ruby version: 2.7.2
> Rails version : 6.1.5
> Database : default SQLite3 >
I will create an app with only one function, , other functions you can do the same.testapp
## 1. Create Controller and Model * First, I create a new Rails app named .
Open Terminal and do the following:
$ rails new testapp Wait for it to run, then direct the address to the newly created app location
$ cd testapp
* Create controller named with page index
~/testapp$ rails g controller posts index 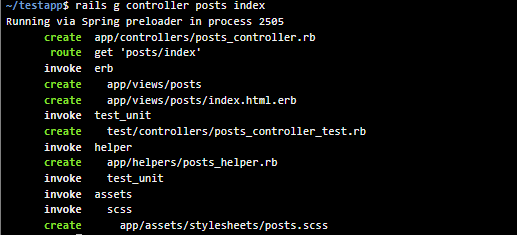post
* Create model with column title, data type as text ~/testapp$ rails g model post title:text migrate
* Creating a model is indispensable with the command. ~/testapp$ rails db:migrate ## 2. Build views and validation * If you want to access the website, you must first install routing, right! ^^testapp/config/route.rb
ruby Rails.application.routes.draw do resources :posts, only: [:index, :create] root “posts#index” end resources applies only to methods index and create .index.html.erb
* Next, please access the file by the path testapp/app/views/post/index.html.erb and add the code below. html
Posts#index
Find me in app/views/posts/index.html.erb
<%= form_for @post, remote: true do |f| %> <%= f.text_field :title, class: “input-box” %> <%= f.submit %> <% end %>
The above code uses , so it must have remote: true, if you use form_with, you do not need to add remote: true because in form_with the default of remote is already true. already. If you get an error instead of form_with, try restarting the server a few times and then try again.form_for
You can replace with form_with as follows:
html <%= form_with model: @post do |f| %> <%= f.text_field :title, class: “input-box” %> <%= f.submit %> <% end %>
* Above I used so now I have to create a partial file.testapp/app/views/post
You go to the folder and create a new file named _post.html.erb. Then add the following code to the file: html <%= post.id %>- <%= post.title %>
* Do not leave blank when creating a post. File testapp/app/models/post.rb edit as follows. ruby class Post < ApplicationRecord validates :title, presence: true end ## 3. Build Controller and template * Once the views are done, then the controller part, you edit the file testapp/ app/controllers/posts_controller.rb as below. ruby class PostsController < ApplicationController def index @posts = Post.all @post = Post.new end def create @post = Post.new(post_params) respond_to do |format| if @post.save format.js end end end private def post_params params.require(:post).permit(:title) end end
* In this article, I use Jquery to build Ajax. I will import Jquery by adding Jquery CDN to the of the file testapp/app/views/layout/application.html.erb. html<%= csrf_meta_tags %> <%= csp_meta_tag %> <%= stylesheet_link_tag ‘application’, media: ‘all’, ‘data-turbolinks-track’: ‘reload’ %> <%= javascript_pack_tag ‘application’, ‘data-turbolinks-track’: ‘reload’ %><%= yield %>* The final step is to create a tempate.In controller we just created def create function so we also need to create a template for create in views section. However, since we want to use Ajax, our template is not ~~create.html.erb~~ but create.js.erb.Go to the testapp/app/views/posts folder and create a new file named create.js.erb. Then add the following code to the file. javascript $(‘.box’).append(“<%= j render @post %>”); $(‘.input-box’).val(“”); $(‘.box’).append(“<%= j render @post %>”); : On the index.html.erb page we put the post display in the tag
append để add thêm các post mới vào thẻ div này.Câu lệnh <%= j render @post %> là cách viết tắt của <%= escape_javascript(render @post) %>. Nó giúp lệnh render của chúng ta tránh bị lỗi ký tự khi render file partial. Các bạn có thể đọc thêm về escape_javascript ở đây
https://stackoverflow.com/questions/1620113/why-escape-javascript-before-rendering-a-partial Hoặc
https://apidock.com/rails/ActionView/Helpers/JavaScriptHelper/escape_javascript
Còn $('.input-box').val(""); có tác dụng làm trắng khung input trong form sau khi tạo post thành công.
# Complete
So we have finished writing a simple Ajax app using Jquery and Rails. Let’s go to localhost and see what results!
* Start the server, our default localhost is port 3000. ~/testapp$ rails s Results 
Yes, It’s works ! ??
Thus, we can see that thanks to Ajax, we can create new posts and the newly created posts will immediately appear on the screen without having to reload the page. # Summary —– Above are the super basic steps to create an Ajax app using rails. In addition to the above create feature, people can also do the same with other features such as update, edit or delete.
I’m also learning Rails on my own, so I hope everyone reads and comments.
Source : Viblo