This is a translation from medium.com . Please see the original post here: https://medium.com/better-programming/5-auto-layout-approaches-at-swift-b229cf396ee2
To create the user interface to adapt to changes in the screen size and device orientation, we use Auto Layout , a layout system that relies on constraints. This article provides an overview of five different approaches to adding code constraints.
Why use Auto Layout
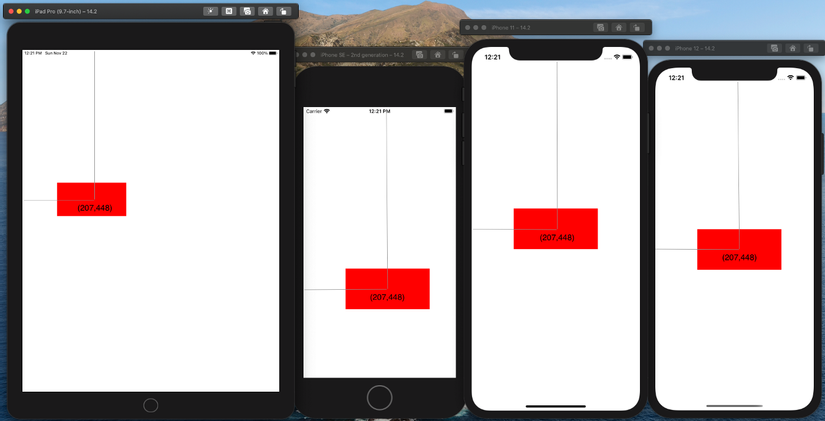
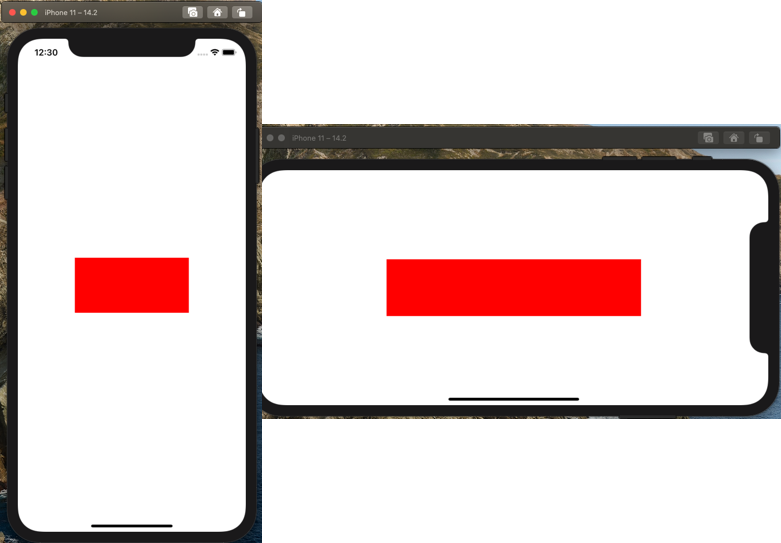
Without Auto Layout the position of the subview per view will be fixed. If we place a subview with a red background color in the center of iPhone 11, then this red center view will be fixed at (207, 448) since iPhone 11 has a horizontal dimension of 414 points ( 828 pixels) and the vertical dimension is 896 points (ie 1792 pixels).
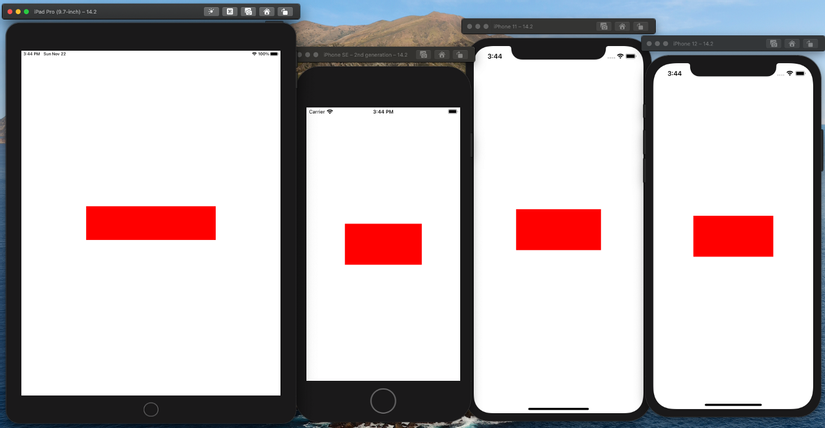
When we run apps on iPhone SE, 8, 12, and iPad Pro, we see the red view no longer in the center of the screen.
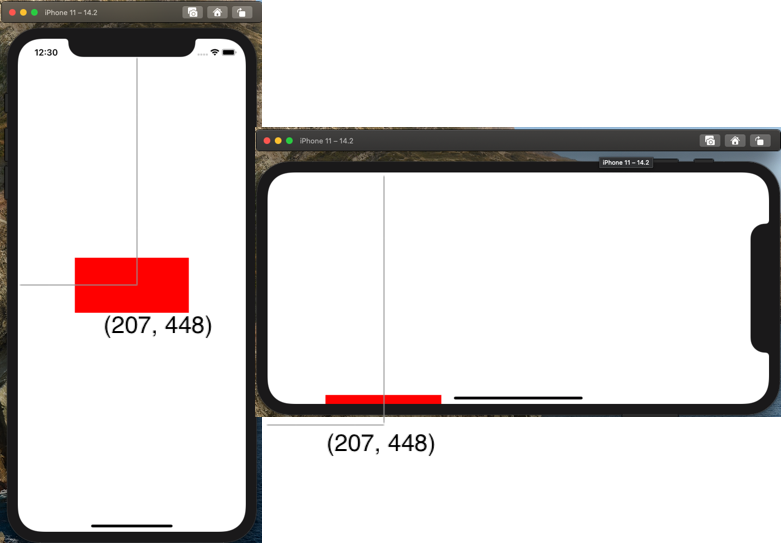
When we shoot the screen on the iPhone 11 the red view will also run out of the screen.
1. Use NSLayoutConstraint
NSLayoutConstraint determines the relationship between two interface objects by a linear equation with the following format: item1.attribute1 = multiplier × item2.attribute2 + constant
attribute1andattribute2are variables thatAuto Layoutcan adjust when resolving these constraints. For example the properties of a constraint are:left,right,top,bottom,leading,trailing,width,height,centerX,centerY,lastBaseLine…multiplierandconstantdefine the relative positions of the two properties.
For example, when placing a subview on another view , we will use the following code to add Auto Layout for that subview as follows:
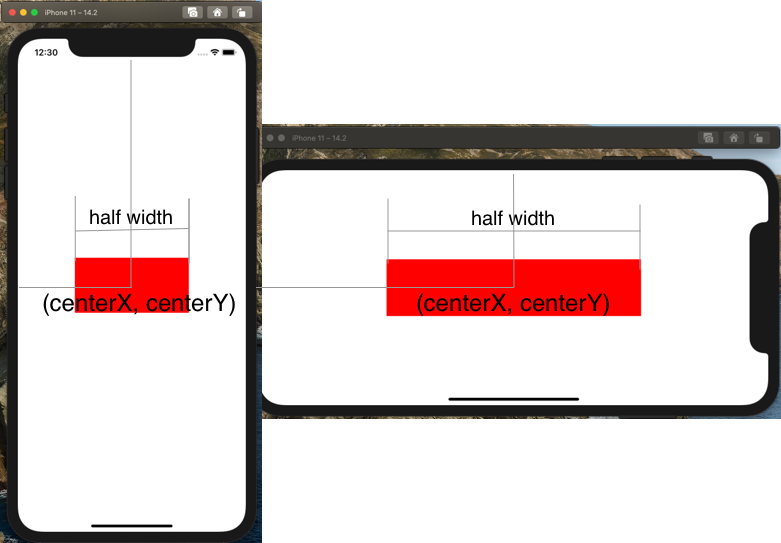
1 2 3 4 5 6 7 8 9 10 11 12 13 14 15 16 17 18 19 20 21 22 23 24 25 26 27 28 29 30 31 32 33 34 35 36 37 38 39 40 41 42 43 44 45 46 47 48 49 50 51 52 53 54 55 | private func addConstraintUsingNSLayoutConstraint() { subView.translatesAutoresizingMaskIntoConstraints = false // X Constraint let centerXConstraint = NSLayoutConstraint( item: subView, attribute: .centerX, relatedBy: .equal, toItem: view, attribute: .centerX, multiplier: 1, constant: 0 ) // Y Constraint let centerYConstraint = NSLayoutConstraint( item: subView, attribute: .centerY, relatedBy: .equal, toItem: view, attribute: .centerY, multiplier: 1, constant: 0 ) // Width Constraint let widthConstraint = NSLayoutConstraint( item: subView, attribute: .width, relatedBy: .equal, toItem: view, attribute: .width, multiplier: 0.5, constant: 0 ) // Height Constraint let heightConstraint = NSLayoutConstraint( item: subView, attribute: .height, relatedBy: .equal, toItem: nil, attribute: .notAnAttribute, multiplier: 1, constant: 100 ) view.addConstraints([ centerXConstraint, centerYConstraint, widthConstraint, heightConstraint, ]) } |
- Set
translatesAutoresizingMaskIntoConstraintsfalsewith the aim of ignoring the effects of theauto-resizing mask. It will also skip changing the size and position of the view using theframe,boundsandcenterproperties. - The above code creates the constraints:
width,height,centerX, andcenterYby specifying the relative positions of these properties.
2. Use visual format language (Visual Format Language)
Most of the useful constraints in the UI can be expressed using Visual Formatting Language. The syntax of the visual formatting language for Auto Layout is here .
1 2 3 4 5 6 7 8 9 10 11 12 13 14 15 16 17 18 19 20 | private func addVisualFormatLanguage() { subView.translatesAutoresizingMaskIntoConstraints = false let views: [String: Any] = ["superView": view!, "view": subView] let metrics = ["width": view.frame.width / 2] let horizontalConstraints = NSLayoutConstraint.constraints( withVisualFormat: "H:[superView]-(<=0)-[view(width)]", options: .alignAllCenterY, metrics: metrics, views: views ) let verticalConstraints = NSLayoutConstraint.constraints( withVisualFormat: "V:[superView]-(<=0)-[view(100)]", options: .alignAllCenterX, metrics: nil, views: views ) view.addConstraints(horizontalConstraints) view.addConstraints(verticalConstraints) } |
viewdefines key-value pairs for each view in the order of the views.- We use
metricsto automatically compute thewidth. Hspecifies this as a horizontal constraint andVindicates a vertical.
3. Use AutoresizingMask
AutoresizingMaskdetermines how the object resizes itself when the size of itssuperviewchanges. When the size of aviewchange, it will automatically change the size of thesubviewunderauto-resizing maskofsubviewit. You specify the value of thisauto-resizing maskby combining the constants described inUIView.AutoresizingMaskusing theORoperator. Combining these constants allows you to specify which size theviewwill expand or shrink compared to thesuperview. According to the Apple developer documentation .
1 2 3 4 5 6 7 8 9 10 11 12 13 14 15 16 17 18 19 20 | private func addAutoresizingMask() { subView.translatesAutoresizingMaskIntoConstraints = true subView.bounds = CGRect( x: 0, y: 0, width: 207, height: 100 ) subView.center = CGPoint( x: view.bounds.midX, y: view.bounds.midY ) subView.autoresizingMask = [ .flexibleLeftMargin, .flexibleRightMargin, .flexibleTopMargin, .flexibleBottomMargin ] } |
- In order to use
AutoresizingMask, it’s important to settranslatesAutoresizingMaskIntoConstraintstrue - We specify a size and location for the
subView - We leave the
subView‘ssubViewflexibly attop,left,rightandbottomto keep its dimensions constant and always at the center of thesuperview.
4. Use NSLayoutAnchor
NSLayoutAnchorbuilds the constraint by starting with aviewobject and choosing one of the anchor properties of that object. These properties correspond to the mainNSLayoutConstraint.Attributevalues used inAuto Layoutand provide a suitableNSLayoutAnchorsubclass to create constraints for that property. According to the Apple developer documentation .
1 2 3 4 5 6 7 8 9 10 11 | private func addNSLayoutAnchor() { subView.translatesAutoresizingMaskIntoConstraints = false NSLayoutConstraint.activate([ subView.heightAnchor.constraint(equalToConstant: 100), subView.widthAnchor.constraint(equalTo: view.widthAnchor, multiplier: 0.5), subView.centerYAnchor.constraint(equalTo: view.centerYAnchor), subView.centerXAnchor.constraint(equalTo: view.centerXAnchor), ]) } |
5. Use intrinsicContentSize
intrinsicContentSize is a get-only property of UIView
It allows a custom
viewto communicate with the size layout system whose size is based on the content. This intrinsic size must be independent of the content frame because there is no way to communicate dynamically when the width changes to the height-based layout system has changed. The only way to useintrinsicContentSizeis to create a new class thatUIView. According to the Apple developer documentation .
1 2 3 4 5 6 7 8 9 10 11 12 13 14 15 16 17 18 19 20 21 | class CustomView: UIView { override var intrinsicContentSize: CGSize { return CGSize(width: 207, height: 100) } } private func useIntrinsicContentSize() { let subView = CustomView() view.addSubview(subView) subView.backgroundColor = .red subView.translatesAutoresizingMaskIntoConstraints = false NSLayoutConstraint.activate([ subView.heightAnchor.constraint(equalToConstant: 100), subView.widthAnchor.constraint(equalTo: view.widthAnchor, multiplier: 0.5), subView.centerYAnchor.constraint(equalTo: view.centerYAnchor), subView.centerXAnchor.constraint(equalTo: view.centerXAnchor), ]) } |
Thanks for reading!